OPC-2000
The DST OPC-2000 is a commercial indoor air quality monitor.
Specifications
Power: AC 100-240V to DC 24V power adapter
Connectivity: WiFi / Modbus via RS-485 / NB-IoT
Measurement Fields
PM2.5
PM10
CO2
TVOC
Temperature
Relative humidity
Configuration
To access the configuration page of the monitor, follow the steps below:
Power up the monitor
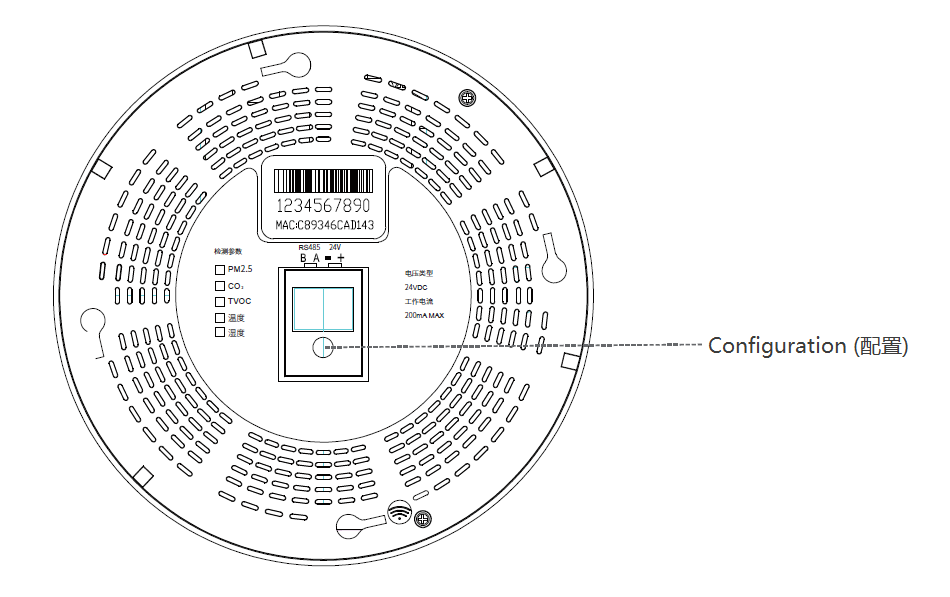
Use a sharp pin to press and hold the “Configuration” button inside the pinhole for at least 8 seconds

Connect a computer or a smart phone to the wireless hotspot created by the monitor; its SSID (network name) should start with OPC or MXCHIP
On the web browser of your device, type 10.10.10.1 or 10.10.10.1/index.html in the address bar and enter
Username: adminPassword: admin
You may now set up the monitor on the configuration page according to the following instructions:
To gather the information required for adding the monitor to the gams platform, see Monitor Information
To connect the monitor to a WiFi network, see WiFi Setup
To configure the monitor to send data directly to gams platform through TCP, see TCP Setup
Do not opt to reboot the monitor after you save each change. Only after you’ve done all the configuration needed:
Click
Module Managementon the left sidebar menuUnder the
Module Rebootsection, click onOK
Monitor Information
Click
Module Managementon the left sidebar menuUnder the
Version Informationsection:Its UUID is on the
Device SNline
WiFi Setup
Click on
Wifi Mode Selecton the left sidebar menuSelect
AP and Stationand click onsaveClick on
Station Mode Settingon the left sidebar menuUnder the
Station Parameter Settingsection, click onscanto select the wireless network you wish to connect the monitor to or manually enter theSSIDFor
Encryption Mode:If the WiFi network does not require a password, select Disable and click on
saveIf the WiFi network requires a password, select Enable, enter the
Passwordand click onsave
TCP Setup
Click on
Uart Settingon the left sidebar menuUnder section
Uart Parameter Setting, changeBaud Rateto9600Click on
Network Settingon the left sidebar menuUnder section
Network Connection Setting, change the following options:Protocol: TCP ClientRemote Port: 8104Server Address: bridge.measureofquality.com